Guide To Emergency Preparedness
by Kevin Wilson
I hope this guide will help you prepare for a range of different emergency situations.
You are vulnerable. Disasters happen every day. If you're not prepared you could suffer for days waiting for help or possibly die from dehydration, starvation, hypothermia, physical injury or other causes. Fortunately you can avoid most of the pain, suffering and regret with a little preparation.
Start preparing now. If you've ever tried to get bottled water, gas, batteries and other supplies right before a hurricane or blizzard, then you know they are always in short supply or unavailable. Finding supplies during an emergency could be impossible. By preparing your kit now, you won't have to go without. Make it easy on yourself, prepare now. Failing to prepare is preparing to fail.
The following recommendations are just a starting point. It would be impossible to write a guide that covers all scenarios - and it would be impractical to create an emergency supply kit for every possible situations. Your emergency supply kit should include items that will be useful in your anticipated situations. Just use a little common sense when putting your kits together. Please don't put it off. It's better to prepare a year too early than a day too late.
Disclaimer
I've tried to provide the most accurate information possible in this guide, however, not to be too dramatic - but your life may depend on the preparations you make. I'd hate to think that you could find yourself unprepared because you followed my bad advice. I'm only human, so I strongly recommend that you verify this information with other reputable sources.
Contact Me
You may contact me at kevin@kevinsworkbench.com
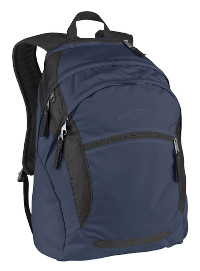
I recommend you put together several emergency supply kits. I'd start with a small emergency kit (some people call it a "bug-out bag") that contains a few of the most important items. Ideally, this kit should be packed in a backpack, waist bag or fanny pack so you can easily carry it when you evacuate. I also recommend a larger, long-term emergency kit with several weeks or months of food, water and other supplies. A small kit for your car is also recommended.
I've listed the contents of several different emergency kits. I've also included the contents of a self-proclaimed "vagabond" who's hitchhiked and hopped trains for over 10 years. You can see that several items are common to most kits. These are the most important items that every kit should have and I've marked them in bold font. Also note that the items in each kit reflect the predicted circumstances the owners are likely to encounter. It shows that there is no perfect kit, your kit should include items that you think will be most helpful to you. The cost I've listed for each item is, of course, just a rough estimate to help you calculate total costs.
| Boy Scouts | Navy Seals | USMC | USAF | Ritter | Wikipedia | Vagabond | $ | |
|---|---|---|---|---|---|---|---|---|
| Alcohol Pads | X | X | $2 | |||||
| Aluminum Container | X | |||||||
| Aluminum Foil | 8 ft2 | 3 ft2 | X | |||||
| Antibiotic Salve | X | X | X | X | X | $3 | ||
| Bandaids | X | X | X | X | X | $2 | ||
| Bandana | X | $1 | ||||||
| Can Opener | X | X | X | |||||
| Candle | X | X | $1 | |||||
| Canteen / Water Bag | X | X | X | X | X | X | X | $5 |
| Chemlights | X | |||||||
| Compass | X | X | X | X | X | X | $5 | |
| Ferrocerium | X | X | X | X | X | X | X | |
| Fire Tinders1 | X | X | X | X | X | $1 | ||
| First Aid Cards | X | X | ||||||
| Fishing Kit | X | X | X | X | X | X | X | $5 |
| Flashlight | X | X | X | X | X | X | $10 | |
| Iodine Solution | X | |||||||
| Knife | X | X | X | X | X | X | X | $15 |
| Knife Sharpener | X | $2 | ||||||
| Latex gloves | X | X | X | $2 | ||||
| Lighter | X | $1 | ||||||
| Magnifying Card | X | 2"x3" | 2"x3" | $5 | ||||
| Matches | X | X | X | X | $1 | |||
| Boy Scouts | Navy Seals | USMC | USAF | Ritter | Wikipedia | Vagabond | $ | |
| Mosquito Headnet | X | |||||||
| Multi-purpose Tool2 | X | X | X | X | X | $15 | ||
| Needles, Thread | 10 ft | 50 ft | X | $2 | ||||
| Pain Pills | X | X | X | |||||
| Paracord | 20 ft | 15 ft | 30 ft | 10 ft | X | X | $4 | |
| Pen / Pencil | X | X | X | X | ||||
| Poncho | X | X | ||||||
| Razor Blades | X | X | X | X | X | $3 | ||
| Safety Pins | X | X | X | X | $1 | |||
| Saw | X | X | X | X | X | $5 | ||
| Signal Mirror | X | 2"x3" | X | X | X | X | $10 | |
| Snare Wire3 | 25 ft | 2 ft | X | 6 ft | X | $2 | ||
| Sunblock | X | X | X | X | ||||
| Sunglasses | X | X | ||||||
| Tape | 9 ft | 2 ft | 2 ft | X | X | $3 | ||
| Tent | X | |||||||
| Thermal Blanket | X | X | X | X | X | $3 | ||
| Towels | X | |||||||
| Tweezers | X | X | X | |||||
| Universal Handcuff Key | X | |||||||
| Water Filter | X | |||||||
| Water Purification Tablets | X | X | X | |||||
| Waterproof Paper | X | X | X | |||||
| Whistle | X | X | X | X | $5 |
1 Make your own with cotton balls and Vaseline.
2 Consider a Swiss Army knife and a pair of pliers as a cheaper alternative to a Leatherman type multi-tool.
3 Snare wire is illegal in some places. Use fishing leader instead.
Sources:
Boy Scouts
Navy Seals
USMC
USAF
Ritter
Wikipedia
Vagabond
Your long term survival kit should basically be a small emergency kit listed above with the addition of larger amounts of water, food and medical supplies. Some or all of the items mentioned further in this guide would also be helpful.
Water is extremely important! You should have at least 1 liter/day or 0.25 gallon/day for each person that's relying on the kit. This only accounts for the bare minimum of drinking water, you'll need additional water for cooking, washing, etc.
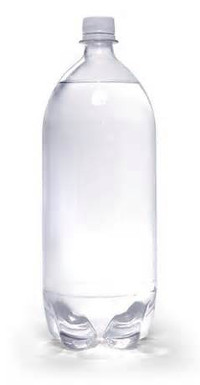
A very easy way to store water is in 2-3 liter plastic soda bottles. They're made of PETE and will keep your water safe for several years.
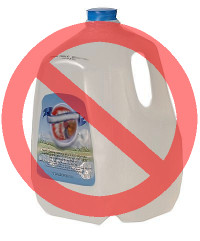
Milk jugs are made of biodegradable plastic and will degrade after about 6 months.
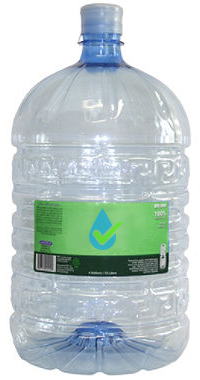
Another option is 4 or 5 gallon water jugs for drinking fountains or water coolers.
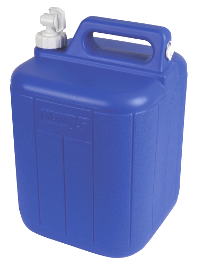
Water carriers and other plastic containers can be used if they are made of food grade plastic (PETE, PET or HDPE) and have an airtight lid.
If you have city tap water that's been chlorinated, simply clean the bottles and fill with tap water. Don't clean the bottles with harsh chemicals that can leave a residue and contaminate your water. Chlorine should be added to unchlorinated water before storage. If you have well water then you should add 8 drops of unscented chlorine bleach or a bit of calcium hypochlorite (see below). Note that water filters will remove chlorine. Stored water should not be exposed to sunlight as it aids growth of bad things and degrades the plastic. Label the bottles with the date you stored them. Store in a cool, dark location.
For centuries people have placed silver coins in water, wine and milk to prevent bacterial growth. More recently NASA has used silver to purify water in space vehicles. Silver is also used in the medical field to prevent infections. I cannot recommend using silver to purify water, but it probably wouldn't hurt to throw a clean junk silver coin into your stored water.
If an emergency occurs and you failed to store clean drinking water, you still have some sources of clean water. If your water service is cut off you can use the water in your hot water heater (you'll have to use the drain spout on the tank). You can also use the water from the toilet tank - not the bowl :-p If you're anticipating lack of water service you can fill up your bath tub (make sure the drain is not leaking) and trash cans to use for flushing the toilet and washing.
Questionable drinking water should be filtered and treated. There are three types of things you want to remove from questionable water - dirt, chemicals and biological contaminates. Most of the dirt can be filtered out with a coffee filter, a few inches of fine sand or some cotton material from a shirt or bandana. Chemicals can be removed with activated carbon or ceramic filters. You can make your own filter with activated carbon from the pet store (used in aquarium filters), but home tap water filters (Brita, Pur, etc.) are much better. Finally, any remaining biological contaminates can be killed by one of the following methods:
Grocery store shelves will be emptied in 1 or 2 days after a major emergency. If a truck does not (or cannot) bring in new stock, what will you eat? You can probably live off your pantry for a few days, but what will you do after that food runs out? I strongly recommend storing some food - starving is an extremely unpleasant way to live, and die. Fortunately, using modern food preservation techniques, many foods can last over 30 years in storage.
How Much Food Should You Store
Ideally, an adult will have at least 1 pound of dry food (pasta, beans, rice, etc.) every day, or at least 4 cans of food every day. How much food you store is up to you. Most people underestimate how much food they'll need in an emergency. The average person can easily live on 2,000 calories a day, but physical activity, cold or wet weather and other things may increase caloric requirements to maybe 3,000 a day. Of course, in a survival situation your goal may not be comfort - but simply to survive. In that case you'll generally need about 1,000 calories a day. At that caloric level you'll probably be a little hungry all day and you'll probably lose weight slowly.
Long term food storage usually consists of:
Dry Foods Suitable For Long Term Storage
Foods that are suitable for long term storage are generally dry with no oils. Some of the best foods to store are:
Food to avoid are:
If you store whole grains you'll need to mill your grains into flour. Most people seem to really like the "Country Living grain mill". If buying bulk grains, beans, etc. from a farm or factory, be sure the food does not contain chemicals and is safe for human consumption. After a few years you may want to begin rotating your stored foods to ensure they get used before going bad. Rotate your food storage using the "first in, first out" process. Some beans are poisonous if not cooked properly (especially kidney beans and soy beans). The poisonous compounds can be deactivated by boiling beans for ten minutes. Cooking at lower temperatures (in slow cookers and crock pots) can increase the amount of poisonous compounds.
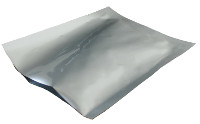
Mylar Bags
Mylar bags are probably the best way to store dry foods. They're made of polyester film laminated to aluminum foil. They protect their contents from air, moisture and light.
Bags used for food storage are available in various sizes ranging from 1 to 5 gallons. The thickness of the bags can vary and is measured in mils. The cheapest bags measure about 3 mil, while the average bags are close to 5 mil. The highest quality bags are usually about 7 mil thickness. The thinner bags should protect their contents for many years, but will be more susceptible to puncture from sharp, rigid contents (e.g. pasta).
Mylar bags can be sealed with a clothes iron, hair straightener, clam shell sealer or other device. When sealing the bag, first clean any residue from the inside of the bag (where you plan to seal it) with a dry cloth. Remove as much air as possible then use an iron or other device to melt the bag together, being careful not to melt completely through the bag. Some bags come with a zip-lock seal which will only keep the contents fresh for a short time. These bags should be sealed just like bags without the zip-lock. Do not use clear bags or mylar that is not specifically intended for long term food storage. For step-by-step instructions please refer to my Guide to Filling Mylar Bags.
The bags should be placed in a bucket, plastic tote or other container to protect them from water, bugs and rodents - then stored in a cool location. Bakeries, restaurants and grocery stores will often give you empty food grade plastic buckets - although they may smell like potato salad and pickles. Clean them with baking soda to remove the odors. Avoid using chemical cleaners.
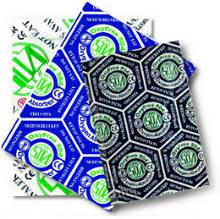
If you decide to store food in mylar bags or buckets, you'll need to include oxygen absorbers to... absorb oxygen. Without oxygen the oils in the food can't oxidize and turn rancid, and aerobic bacteria and fungi can't grow. Bugs will also be killed. Some items like salt and sugar do not need an oxygen absorber, unless you want them to turn into bricks.
You'll need the correct size of oxygen absorber packet for your containers. If your packet is too small, it won't absorb all the oxygen in the container. It's much better to use oxygen absorbers that are too big. Oxygen absorbers are sized by cubic centimeter (cc) of oxygen they can absorb. Common sizes are 100cc, 300cc, 500cc, 1,000cc and 2,000cc. After filling a container, some foods will leave more air space than others. On average foods will fill about 63% of the container. Assuming the contents fill 63% (37% remaining air) and the container will be 90% full and air contains 21% oxygen; here's a good estimate of the required absorber for various containers:
| Container | Empty Volume | Oxygen Volume When Full | Recommended Absorber | Food Capacity* |
|---|---|---|---|---|
| 1 pint Jar | 475 cc | 40 cc | 50 cc | ? |
| 1 quart Jar | 950 cc | 80 cc | 100 cc | 1.5 lbs |
| 2 liter Bottle | 2,000 cc | 175 cc | 200 cc | 3 lbs |
| #10 Can | 3,300 cc | 285 cc | 300 cc, 500 cc | 4.5 - 5.5 lbs |
| 1 gal Bag | 3,785 cc | 330 cc | 500 cc | 5 - 7 lbs |
| 5 gal Bucket | 18,940 cc | 1,640 cc | 2,000 cc | 30 - 35 lbs |
| 6 gal Bucket | 22,800 cc | 1,980 cc | 2,000 cc - 2,500 cc | ? |
| 55 gal Drum | 209,200 cc | 18,100 cc | 20,000 cc - 22,000 cc | ? |
* Only accurate for "solid" foods like rice, beans, pasta, etc. Subtract about 30% for "fluffy" foods in powder and flake form.
Use the following formula to calculate the approximate oxygen volume in a container after being filled with food:
Oxygen Volume When Full (cc) = Empty Volume (cc) * 0.0866
For example, the empty volume of a 1 gallon jar is 3,800cc so the remaining oxygen after filling it will be about 3,800cc * 0.0866 = 330cc. I'd recommend a 500cc absorber, but you may be able to get by with a 300cc absorber.
How can you know what cc your oxygen absorbers are rated for? Most oxygen absorbers are not labeled with their cubic centimeter rating. A 300cc absorber should weigh about 0.3oz. You can measure the area of the packets (length * width) and refer to this table:
| Area (square inches) | Area (square mm) | Oxygen Absorber Rating (cc) |
|---|---|---|
| 3 - 3.5 | 2,000 | 100 |
| 5 - 5.5 | 3300 - 3500 | 300 |
| 6 | 3,800 - 4,000 | 500 |
| 10 - 11 | 7,000 | 1000 |
Note - packets from different manufactures will vary in size. The specifications listed are only an estimate.
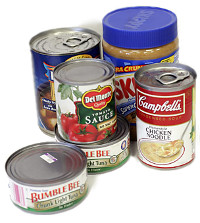
Canned foods are probably the easiest way to store food. Most canned foods will store for a few years, there's a good variety of foods available and it won't need to be cooked. On the down side, it's more expensive, less portable and often high in salt. Never open a can if it's bulging, it may have botulism.
I've put together a (mostly) canned food storage kit that meets the following criteria:
The following will feed 1 person for 1 week:
The list assumes standard 15oz size cans. You can use different sized cans, but you'll need to adjust the number of cans. Small, single serving cans are more convenient, but more expensive.
Here are a few recipes to make nutritionally balanced meals:
(The listed amounts are for 1 person)
The meals that I have specified will provide about 1700 calories/day. That should be enough to keep you alive and healthy, but it's unlikely you'll be able to hike long distances or perform hard work every day, especially in cold temperatures. To further break down the nutritional details, 1 day of rations will provide:
Canned food is very difficult or impossible to find with low sodium. Try to get low sodium items whenever possible. Too much salt will dehydrate you, and clean water may be in short supply. Get the mixed fruit in heavy syrup, the extra calories will help. You may want to consider the tuna that comes in pouches with added flavors. It costs more but since I can barely stand the wretched taste of tuna, it's worth it. Avoid brown rice or whole wheat pasta. They have natural oils that will shorten their shelf life. Most cans have peel off tops, but if they don't it's a good idea to keep a cheap can opener with your kit. Food should not be stored in the can. After you open it - eat it. Paper labels can fall off cans so it's a good idea to label the contents and date of purchase on each can with permanent marker.
Nutrition bars are a good option due to the convenience and good nutritional profile. I recommend you add several to your kit. They're much more portable than canned foods, so they'll make it easier to relocate. The downside to nutrition bars are price and shorter shelf life. They cost about $1.25 each and only last about 1 year. Try to find them on sale and as fresh as possible - probably impossible because they generally only go on sale to get rid of older bars. Clif Bars seem to receive the highest reviews. They taste good and are all natural so they are good for you. Builder bars have extra protein.
MREs are expensive and don't digest well, but they're very portable and have a very long shelf life. I would only pack them if I were planning to be moving around. Be sure to store them in a cool location. MREs don't have much fiber, so store extra fiber supplements with them.
Companies like Mountain House sell freeze dried food in pouches and #10 cans. The pouches can last about 7 years, while the #10 cans can last about 25 years. Unfortunately, the cost for freeze dried food is relatively high.
Fruits and vegetables can be dehydrated and stored for several years. Meat can also be dehydrated, but it should be stored frozen. This may not be possible in an emergency. Dehydrated foods can last over 10 years when moisture levels are reduced to 3-5% and stored in an air-tight, waterproof, food grade container or bag with oxygen absorbers and possibly a desiccant. Food is dried by circulating hot (about 125 to 140 deg F), dry air around the food until it's dried (95% or more dehydrated), usually about 8 to 12 hours. To test for dryness, let the food cool for 5 to 10 minutes. If it feels sticky, continue drying. An electric food dehydrator is probably the best method to dry food, but you can also use an oven or the sun.
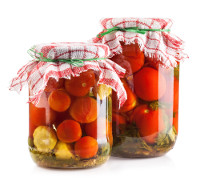
Many foods can be canned at home. Acidic foods should last 1-2 years. Low acid foods can last 3-5 years. Food must be canned and stored properly or it can cause food poisoning. The canning process is too extensive to be covered here.
Salt can be used to improve the taste of bland stored foods, canning and preserving meats. It's a required mineral to maintain good health. Salt is cheap and easy to store indefinitely. Simply prevent exposure to moisture, rodents and chemicals. Due to the low price and ease of storage, I recommend integrating a fairly large amount of salt into your food storage.
Curing meat was common practice before modern refrigeration made it obsolete. It's becoming a lost art and directions for curing meat are difficult to find. Basically, lean meat is cut into thin, uniform strips, soaked in a salt solution (brine), removed from the brine and covered with salt, hung in a cool dry location and allowed to dry. Hams are basically the same, but the brine solution is also injected into the meat. Drying can be done in a smoker. Curing salt should be used to cure meat. It contains salt, nitrates and nitrites. The nitrates and nitrites are required to help ensure the meat does not spoil or turn gray while curing. Some curing salts also contain spices. Regular table salt should only be used for curing as a last resort. More specific instructions can be found in books and online. If you cure meat, be sure to do it right so as not to poison yourself.
Cooking
I recommend a kerosene or propane cooking stove. Kerosene will also be useful in space heaters and emergency lighting. Both kerosene and propane can store for long periods without breaking down. If your kerosene stove or heater smells funny, you probably need to clean it and replace the wick. For cooking small amounts of food, I recommend a small, portable camping stove. The Coleman PefectFlow 1-Burner Stove is cheap and works well. It should run for a few hours on a 1 lb bottle of propane fuel. The Coleman Exponent Multi-Fuel Stove can use Coleman fuel, unleaded gasoline or kerosene. Sterno or canned heat cooking fuel is cheap and easy to use but does not supply much heat. You can also make a stove by putting tightly roller cardboard in a can and filling it with wax. If you can't cook pasta and rice, they can be "cooked" by soaking in water until soft. A solar oven may be an option if you live in a sunny location. A good, old fashion camp fire will also work, but it can be improved by burning wood in a "rocket stove" or "Dakota fire hole".
Beyond Storage
It's impractical and probably impossible to store more than a couple years of food. A better alternative is sustained food production, like gardening and raising animals. Square foot gardening seems popular and easy. Chickens and rabbits can provide an unlimited supply of meat.
More Information
The LDS church has an excellent page on longer-term food supply. (I'm not affiliated with the church.)
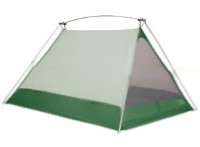
Hopefully you'll be able to remain in your home, or at least stay in someone else's home, a community shelter or a hotel. If not, then you'll want to have some sort of shelter to protect you from the cold, rain, sun, etc. Depending on the situation, security may be a very important factor when considering shelter.
In an urban environment you should be able to find shelter in various places like old buildings, under bridges or abandoned cars. In a more rural environment you may have to construct your own shelter.
The most simple shelter is probably a tarp. It should offer protection from wind and rain, but won't keep you warm. A tarp / sleeping bag combination may be all the shelter you need. A tent offers a little better protection and is usually easier to set up.
Without a tarp or tent you'll need to use other building materials (tree branches, palm fronds, snow, sheet metal, etc.) An A frame shelter is fairly easy to build. Instructions are beyond the scope of this page, but an internet search will yield good information. In cold weather, swampy land or areas with insects you should construct a raised bed to keep you off the ground. In hot weather you can dig a pit about 2 feet deep to stay cooler. The pit should be shaded. If trees can't provide shade, a tarp will work. Adding a second tarp 1 foot above the first tarp will help keep the shelter cooler.
Do not set up a shelter in a drainage ditch or close to a river bed. If it rains, you may find yourself swimming to safety. Avoid fires inside your shelter. If you must have a fire, keep it as small as possible. Keep flammable objects away and be sure to provide ventilation for the smoke and carbon monoxide.

While clean clothes are not required for survival, it's nice to have a couple pairs of clean socks and underwear to maintain hygiene. In winter all clothing should be wool or synthetic fiber. They will keep you warm, even if they get wet. Cotton can help to keep you cool in summer heat. If you need to hike to safety, you should have several pairs of clean, dry socks. Wool socks are the best at keeping your feet warm and dry. Wearing two pairs of socks can help to prevent blisters. Wet socks can quickly result in blisters that can prevent you from moving and may become infected. Jeans may be tough, but they will not keep you warm if they get wet. Military surplus pants work well. You may also want to consider a long sleeve and short sleeve shirt. A hat in the summer and a wool or synthetic cap in the winter will help. If you live in a cold region, you should add a base layer of thermal underwear. A light waterproof jacket can help to keep you dry in the rain.
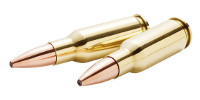
Firearms are a very important tool in a crisis situation. They're the best way to provide security and food. Ideally, you should have several different firearms - a shotgun, handgun, large rifle, and small rifle. Each is suited for a particular task.
This is a much debated subject, but I generally recommend a 9mm semi-auto or a .38/.357 cal revolver for portable kits and a shotgun for stationary kits. However, firearms and ammunition can be used for barter, so you should stick with calibers that are common in your area.
A shotgun is the most versatile firearm. It can be used for self defense and hunting anything from squirrels to bears. I recommend a 12 gauge pump. Many different types of shot shells are available and I recommend #4-#6 shot for smaller game (birds, rabbits, etc.) and 00 buck or #4 buck for larger game and self defense. A slug will destroy anything it hits. If you can only have one firearm, it should be a shotgun.
Note - Many states have rules restricting what game can be hunted, the type of shot used for various game, the maximum number of shells your magazine can hold, etc. These rules may influence your choice of shot shells and other decisions. However, if there is a complete breakdown of law enforcement, then these rules may not be a concern.
Handguns are the best tool for self defense, and larger calibers can also be used for hunting. Revolvers are simple and reliable, while a semi-auto will have greater round capacity. I recommend a .38/.357 revolver or 9mm semi-auto (I like Glock and Sig). You should have a good holster and belt (I like Amish belts).
A large rifle is a great tool for hunting larger game. With a good scope you can hunt out to 500 yards. I recommend a .308 caliber (I like Savage and Remington).
A small rifle is good for hunting small game. The ammo is cheaper and the rifle will be smaller and lighter with less recoil. I recommend a .22 LR caliber (I like Ruger 10/22 and Savage).
If you can't have firearms available, a good sized knife is probably the next best thing (I like Ka-Bar and Benchmade).
You may have a neighbor who can help provide security for the neighborhood, but I wouldn't trust my safety to anyone.
Most rifles and shotguns are sold with a cheap, plastic, hollow stock. Don't waste that space! Often you can remove the butt plate or recoil pad from the end of the stock and fill the stock with a small emergency kit (refer to my Benelli Nova page). It's a great place to store a fire starter, dryer lint with Vaseline (refer to the Fire section), cord, cash, paper or whatever else will fit. I do not recommend storing the "strike anywhere" type matches, the recoil may ignite them. Some gun cleaning items will be helpful for keeping your firearm operating well in the field.
How much ammunition should you store? That's a very tough question that depends on many factors. My personal opinion would be 2000 rounds of each caliber your own.
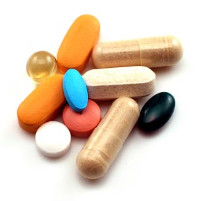
Get a good medical kit - not one of those cheap, little ones. You can make your own if you want.
Your medical kit should include an assortment of medicines, band-aids, ace bandages, gauze, alcohol wipes and whatever else you think you may need. An emphasis should be placed on medicines to treat infection (antibiotics, antibacterials and antidiarrheals).
General Medications
The following medicines can effectively treat most common illnesses. They're all available over the counter.
NyQuil can be made at home by combining Tylenol, Vicks 44 (or Mucinex) and Benadryl.
Antibiotics usually require a prescription, but you may be able to find some at pet stores. Unfortunately the quality standards of antibiotics used for animals are not well regulated. Information about aquarium fish antibiotics can be found here.
Radiation Sickness Prevention and Treatment
You can protect yourself from radiation sickness based on the following:
The treatment method is very simple. Saturate your body with non-radioactive elements similar to the radioactive elements and your body will not absorb the radioactive elements (or the amount absorbed will be significantly reduced).
What are the non-radioactive elements? What radioactive elements are they similar to? How much should you take?
| Radioactive Element | Non-Radioactive Element | Daily Dose |
|---|---|---|
| Cesium-137 | Potassium | About 10 tablets (99mg each) |
| Iodine-131 | Potassium iodide | 130 mg |
| Strontium-90 | Calcium | 2500 mg |
Note - the daily dose is a recommended estimate.
Anti-oxidents can significantly reduce the amount of damage from radiation in your body. In addition to the elements listed above, it's strongly recommended that you include as many of the following anti-oxidents as possible:
| Anti-oxident | Daily Dose |
|---|---|
| Selenium | 200 micrograms |
| Vitamin C | 1000 mg |
| Vitamin E | 200 mg |
| Co-enzyme Q-10 | 300 mg |
| Melatonin | 10 mg |
| N-Acetyl Cysteine (NAC) | 800 mg |
| Alpha Lipoic Acid (R-lipoic acid) | na |
| DIM (diindolylmethane) | 1000 mg |
Note - Melatonin will make you sleepy, take at night. Vitamin E often comes in soft gelcaps that are filled with oil and do not have a long shelf life.
Unfortunately, common multivitamins do not include or don't have sufficient quantities of the elements and anti-oxidents you'll need. It's best to buy them separate.
Also refer to the Radiological Considerations section.
Apparently most medications will remain safe and effective well past their expiration date.
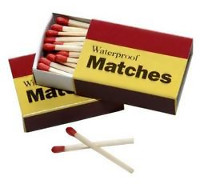
Fire is great for cooking, warmth, security, clean water, good spirits, insect repellant, etc. You should have several methods to start a fire. I recommend a few of the following:
To help get a fire started, it's a good idea to keep some tinder in your kit.
A small candle is easy to light (with a lighter or matches) and will easily continue burning until your "real" fire is established.
Mixing dryer lint or cotton balls with Vaseline will make a great fire starting compound. Simply work in enough Vaseline so the lint or cotton is moist, then store in a small bag or container. A pea-sized amount will burn like a candle flame for about 1 minute.
Char cloth is a piece of fabric that's been "charred", which makes it very easy to ignite. To make char cloth, cut pieces of cotton or linen fabric and place them loosely into a sealed, small metal can or box. Punch a small hole into the top of the can. Place the can over hot coals. Smoke will escape from the hole. Remove it from the coals after it stops smoking. After allowing it to cool, open the container and inspect the char cloth. It should be black and soft. If it's brown then continue charring. If it's black and crumbly, it's over cooked and should be thrown away.

During an emergency you'll need information, you may become lost and need directions, you may need to plan and coordinate with others, you may need to signal for help.
Your cell phone can be helpful, but it suffers from limitations. The battery will probable die after a few days without power. The cell phone network will likely be overwhelmed with calls. The cell towers in your area could be destroyed. You may want to consider buying a solar phone charger.
A company called Xpal sells a cell phone called SpareOne that's intended to be stored and used during emergencies. It runs on a single AA Energizer Ultimate Lithium battery that can be stored for up to 15 years. The phone can operate for 10 hours on the single battery.
A radio will be a good source of information. The best source for local news will be AM stations. Radios can be grouped into the following categories:
Emergency radios with hand crank - Most have solar panels, cell phone chargers, etc. Unfortunately, most emergency radios suffer from poor quality. The solar panels and phone chargers are inadequate (it has to set in the sun all day to charge, you have to continuously crank to make a phone call, the flashlight is dim and quickly drains the battery). They should be used at least once a month to prevent the rechargeable batteries from dying. I recommend the following:
| Model | Cost | Solar Panel | Phone Charger | Light | Notes |
|---|---|---|---|---|---|
| Sangean MMR-77 | $42 | No | No | Yes | Also powered by AA batteries |
| Eton FR160 | $25 | Yes | Yes | Yes | |
| Kikkerland Dynamo | $27 | Yes | No | No | |
| Midland ER102 | $36 | No | Yes | Yes | |
| Freeplay EyeMax | $50 | Yes | No | Yes |
Battery powered radios - If you don't mind storing batteries, replacing batteries and risking dead batteries, these radios offer much better quality and reception. I recommend the following:
| Model | Cost | Batteries | Battery Life | Notes |
|---|---|---|---|---|
| Sony ICF-S10MK2 | $10 | 2 AA | 40 hours | Best bang for the buck, good reception |
| Sony ICF38 | $25 | 4 AA | 80 hours | Better reception than ICF-S10MK2 |
| Sony SRF-59 | $15 | 1 AA | 100 hours | Headphone only, great reception |
| Sony SRF-M37W | $30 | 1 AAA | 40 hours | Digital, headphones only |
| Sangean DT-400W | $65 | 2 AA | 40 hours | Digital, very good reviews |
| Sangean DT-200X | $45 | 2 AA | 40 hours | Digital, excellent reception |
| Sangean SR-35 | $30 | 2 AA | ? | New model, analog |
| Sangean SR-3 | $30 | 1 AAA | 60 hours | Analog |
Neighbors can be a good source of information - if you can filter out the rumors and speculation.
Electronics can be damaged by EMP. Protect them by wrapping in a few alternating layers of aluminum foil and plastic. You can also protect them inside a metal container with a very tight fitting lid, basically airtight. The lid must overlap the container and have a good electrical connection to the rest of the container.
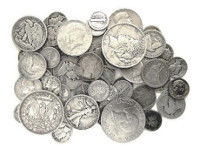
If things stay bad, eventually you'll need to buy or trade for supplies. It's good to keep some cash handy. ATMs won't work if the electricity or internet is out, and they may have been drained of cash anyway. Credit card machines rely on the internet and electricity so don't count on them working. If you need food from a neighbor, I doubt they'll accept plastic. It's hard to say how much cash to store. I'll just let you decide on that.
Barter will be a good way to get items you need in a long-term crisis. To be successful, you'll need to have extra items that are in demand. According to popular belief, these are some of the items that will be in demand:
If the emergency is accompanied with the collapse of the dollar, you should have silver and/or gold coins for use as currency. I recommend 90% junk silver coins. You can learn more on my junk silver guide.

In some types of emergencies (terror attack, riots, etc.) you may find yourself in a police state. If you're forced to travel, you may need to carry ID cards to pass checkpoints or gain access to restricted areas and buildings. You should also consider carrying cash for bribes. You probably already carry your drivers license, but other documents like your birth certificate, SS card and marriage license should be kept in a safe place. I recommend keeping a copy of these documents in your emergency kit.
Most people don't know anything about radiation exposure. It falls into the category of "science stuff", which most people make enormous efforts to avoid, then their ignorance metastasizes into extreme fear when something happens. They end up running around like a chicken with it's head cut off at the mercy of superstitions and "facts" they learned from Hollywood movies. Don't be one of those people. Educate yourself.
What is Radiation?
Radiation is simply atomic particles and electromagnetic waves that are traveling. It sounds complicated, but allow me to explain further.
Types of Radiation?
Radiation comes in two different varieties: ionizing and non-ionizing radiation. We're only concerned with ionizing radiation because it's able to damage biological tissue.
Ionizing radiation comes in several different types: alpha particles, beta particles, neutron particles, x-rays and gamma rays. There's some important differences between them that you should know.
Alpha particles are the bowling balls of radiation. They're big, heavy and slow moving. Because of their large size they don't penetrate very far. In fact, they can't even penetrate clothing or the thin layer of dead skin cells we all have. Alpha emitting contamination is not much of a threat, unless it's swallowed or inhaled. Alpha radiation can cause significant internal damage.
Beta particles are smaller than alpha particles and penetrate further. Clothing will stop most beta particles, but they can penetrate exposed skin and cause skin damage. They're also very damaging if swallowed or inhaled.
Neutron particles are very penetrating and can travel miles.
X-rays should be familiar. They're an electromagnetic wave, not particles (like alpha, beta and neutron). They can obviously penetrate our body and cause damage in higher doses.
Gamma rays are very similar to X-rays, except they have higher energy and penetrate further.
If an unfortunate incident were to occur, you would likely be concerned about radioactive material (fallout) that is emitting some of the aforementioned ionizing radiation. You can think of fallout as a powder that will fall like snow and cover every exterior surface. It's imperative to avoid contact with the fallout or anything that's been contaminated with the fallout. Do not leave your house or the building you're in unless you have to. Seal all windows, doors and vents to prevent fallout from getting inside. If you're forced to travel, you will be contaminated and must be cleaned before entering clean areas so as not to contaminate them. For example, if you travel home through the contamination, remove your outer clothing and shoes before going inside your home. Leave your contaminated clothing outside. Take a shower immediately after entering or at least wash your head, hands and any other exposed areas. Try to stay in a basement or the center of the building so the walls can provide some shielding from the radiation. Be prepared to stay inside for 2 weeks. Avoid going outside for the first 2 days as the radiation levels will be relatively high. For more information refer to "Fallout Protection: What To Know And Do About Nuclear Attack", the official government booklet released in 1961 by the DoD and The Office of Civil Defense.
Many different materials can be sufficiently radioactive to cause concern but I'll spare you the full list. However, I will mention iodine-131, also called radioiodine. Iodine-131 is a common result of nuclear reactions. Your thyroid cannot distinguish radioactive iodine-131 and regular iodine, so it absorbs both. If absorbed, iodine-131 will cause damage due to beta and gamma emission. Before or immediately after exposure to iodine-131, people are given large doses of potassium iodide to saturate the thyroid so it does not absorb iodine-131. I recommend you have 1 week supply of potassium iodide pills. Iodine-131 has a half life of 8 days, so after a week your risk of absorption is significantly decreased.
Measuring Radiation
Radiation is measured with Geiger counters and dosimeters. Meters measure the amount of radiation you are currently receiving. Meters are expensive, but you can still find old Civil Defense meters that were made in the 50s for the Cold War. They may be out of calibration. You can also build your own meter from kits if you're electronically inclined. Dosimeters are used to measure the dose of radiation a person has received.
There are several metrics used to measure radiation including: Curie, Rem, Rad, Roentgen, Becquerel, Gray and Sievert. In America we mostly use Rem, Rad and Roentgen. Most of the time Roentgen, Rad and Rem can all be considered equivalent. I'll use Rem because it's the product of the absorbed dose (in Rads) and a weighting factor which accounts for the effectiveness of the radiation to cause biological damage. Sievert is used in most of the world and is an updated measurement from Rem.
Radioactive Dose
Unfortunately, the science of radioactive dose is very complex with many variables to take into account. Time is an important factor when considering the danger of radiation. For example, over our lifetime we absorb up to 50 Rem of background radiation. But if we were exposed to 50 Rem in 1 second, we would likely develop radiation sickness. Specific parts of your body are more prone to damage from radiation exposure than others. The method of dose is also important. For example, alpha radiation is practically harmless during external exposure because it can't penetrate clothing or the layer of dead cells on your skin. However, if alpha emitters are taken internally, they can become extremely damaging because there is no shielding protection inside your body. Children are more susceptible to radiation, so they cannot tolerate the same levels as an adult. Basically, the lower the dose rate, the longer we can absorb the radiation without damaging health effects. For most people, the best strategy is to refer to general dose guidelines, like the following table.
The following table shows approximately how long you should remain in an area with the given level of radiation. Please note that this is only an approximation and many other factors can effect the time you can safely stay in the area.
| Radiation Level | Leave Within | |
|---|---|---|
| (Sievert) | (Rem) | (Hour) |
| 1 Sv/h | 100 R/h | Immediately |
| 100 mSv/h | 10 R/h | 1 hour |
| 10 mSv/h | 1 R/h | 12 hours |
| 1 mSv/h | 100 mR/h | 24 hours |
| 100 µSv/h | 10 mR/h | 48 hours |
| 10 µSv/h | 1 mR/h | Several days |
Note:
1 R = 1000 mR
1 Sv = 1000 mSv
1 mSv = 1000 µSv
Average background radiation = 0.7 μSv/h
Natural background radiation at airline cruise altitude = 2.7 μSv/h
Also refer to the radiation sickness treatment section.
The issue of sanitation is often overlooked, but it shouldn't be ignored. According to Selco, many people died in Bosnia as a result of infections due to poor sanitation. He recommends a good supply of garbage bags, toilet paper, disposable dishes and cups, disinfectant, detergents, bleach, soap, gloves, masks and antibiotics.
If your water supply is cut off and you don't have a plan to deal with it, you could end up with a very unpleasant situation.
For bathing, a sponge bath uses very little water and is fairly effective.
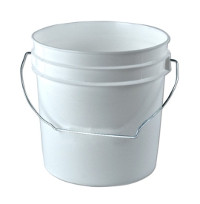
Going to the bathroom can be a serious issue. Contact with human waste can transmit hepatitis, typhoid, parasites, cholera, dysentery and other fun things. If you live in a rural location, you can probably set up an outhouse away from your water supply and that could be the end of your problem. However, if you live in the city or suburbs, you'll probably need a different solution. For short term emergencies, a composting toilet consisting of a bucket with plastic bags can be an option. The waste should be covered with sawdust to help decomposition and control odors. The bags should be tied tightly and then buried, burned or properly disposed of. I keep a phone book to be used as toilet paper if I run out.
You may need to relocate to a safer location. It would be unwise to rely on public transportation. If you have a vehicle, be sure to fill the gas tank as soon as you think an emergency situation may occur. Gas is often in short supply during emergencies. An extra gas can may be a good idea. If you don't have reliable transportation, try to have a friend or family member who can give you a ride. If possible, have a truck or SUV that can carry your supplies, handle rough terrain, get around stalled cars, etc. If your area is flooded, you may need a boat to relocate. Relocating my be impossible in some emergency situations, so have an alternative plan that does not require transportation.
If transportation is unavailable, you may be forced to hike to safety. The distance you can expect to cover can vary significantly depending on the terrain, weather, your physical condition, how many supplies you have, if you have kids or elderly people, your shoes (keep a good pair handy), etc. Most people probably shouldn't expect to hike more than a few miles a day, especially on limited food and water. If you have to hike through unfamiliar area, bring a map and compass (and learn how to use them) so you don't get lost. You can be sure the batteries in your GPS will fail at the worst possible time.
Kit Portability
Emergency kits should incorporate some degree of portability (don't just pile everything in the closet). In the event of a disaster you may be able to stay at your home. In this case portability is not an issue. However, your kit should be portable in case you have to leave your home. I recommend storing your kit in a plastic tote or box that can be easily moved to your car. You may not be able to drive to a safe place, so a backpack is a good way to store a small kit. Try not to over-pack it. You should be capable of carrying it for several miles.
A stationary kit for your home should contain large amounts of stored food and water. A portable kit should have nutrition bars and water treatment gear. The kits will have the following differences:
| Item | Stationary | Portable |
|---|---|---|
| Water | Large containers, buckets | Small plastic bottles, canteen |
| Shelter | Extra blankets | Tent, sleeping bags |
| Food | Canned foods | MREs, nutrition bars |
| Flashlight | Lantern style | Standard beam type |
| GPS | Unnecessary | Helpful |
| Firearm | Shotgun or rifle | Handgun |
Psychological Considerations
It's likely that you'll be stressed during an emergency. Your health and decision making ability can be effected. If you find yourself in an emergency, don't panic. Try to stay calm and assess the situation rationally. Safety should be a top priority in your decision making process.
You may want to pack a book or a deck of playing cards, it could get boring. An Army field manual could be helpful, but not very entertaining.
Try to maintain your usual routines, try to eat and sleep on your normal schedule. This should help reduce your stress levels.
Electrical Power
Electricity is a fundamental part of modern life. Most people will find it extremely difficult to live with power. So what can you do to keep your lights on when the power goes out for an extended time?
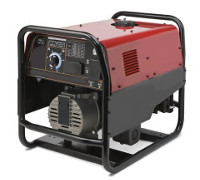
A gas powered generator is probably the easiest way to provide backup power. However, it will require periodic maintenance and fuel may be difficult to store or impossible to find during an emergency.
Solar panels are a good option if you live in a sunny climate. I'm not a solar expert, but hopefully this will get you in the right direction. A solar power system requires solar panels, a charge controller and batteries. The size, number and expense of these components will increase as their power capacity increases. To power a typical house with all it's lights, appliances, etc. can easily cost over $10,000. Fortunately, you can get a smaller system that can power several LED light bulbs, a laptop and battery chargers for about $500.
A good starting point for a small system is a 50 - 100 Watt panel, a 10 Amp charge controller and a 50 A/hr battery. 12 Volt lights can be run off the batteries. An inverter can be connected to provide 120 Volt power outlets. Keep future expansion in mind when selecting components and wires. You'll need batteries specifically intended for solar systems. Some solar panels only produce 6 Volts, but some charge controllers require 12 Volts from the panels. In this case you'll need to wire two 6 Volt panels in series to produce 12 Volts. Be sure to wire in fuses for every component and disconnect switches.
Community
Everyone needs a little help now and then. In an emergency, you'll probably need some help from your neighbors, and they'll probably need some help from you. I recommend that you maintain a good relationship with your neighbors. Everyone has a set of skills (some more than others) that can be useful. Know what your neighbors can do for you, and what you can do for them. A large group of people providing security will be far more effective than one or two guys. Basically, be prepared to work with your neighbors.
Before you start bragging to everyone about your awesome emergency supply stockpile, consider that many of your neighbors will not be prepared at all. If they know you have extra supplies, they'll show up at your place 5 minutes into a crisis begging for help. I do not recommend telling anyone about your supplies unless you can support them in the emergency. I would only mention that you have "a few" or "a small amount" of supplies. They might even show up demanding your supplies - people do strange things when they get hungry.
Skills
Learning a useful skill that will be in demand during an emergency can be very valuable. Health care, repairing shoes, gunsmithing, etc.